Integrating Salesforce Web to Lead Forms with Pardot Landing Pages
Pardot forms add all form submissions from a single prospect under the Pardot activity section of the same prospect instead of creating multiple prospects upon multiple submissions. This is what most people love about Pardot forms.
For some use cases, such as in the Property industry, we have found that the Sales team may want enquiries for different community / property developments to go to the respective community Sales person as a new lead even though those enquiries come from the same prospect.
In an instance like the above, Web to Lead forms can be of great help as they can create new leads which can then be assigned to the relevant Sales person each time a form is submitted in Salesforce. Please note that you should consider this approach very carefully before implementing it as this will lead to the creation of multiple records in Pardot for a single prospect and can become hard to manage in Pardot. AMPSEA must be enabled in order to allow multiple prospects to be created in Pardot.
Once created in Salesforce Web to Lead forms can be added to Pardot landing pages. It is important to note that the Pardot form handler must also be added to the landing page to ensure that Pardot can track the form submissions.
Below are steps to show how you can embed a Web to Lead form in a Pardot Landing page:
- Ask your Salesforce Admin to create a Web to Lead form in Salesforce with all required fields. Ask them to provide all the codes generated for the Web to Lead form and embed them into the Pardot Landing Page.
This will include information for input name, id, label etc for fields and other details such as form action post, recaptcha for the form.
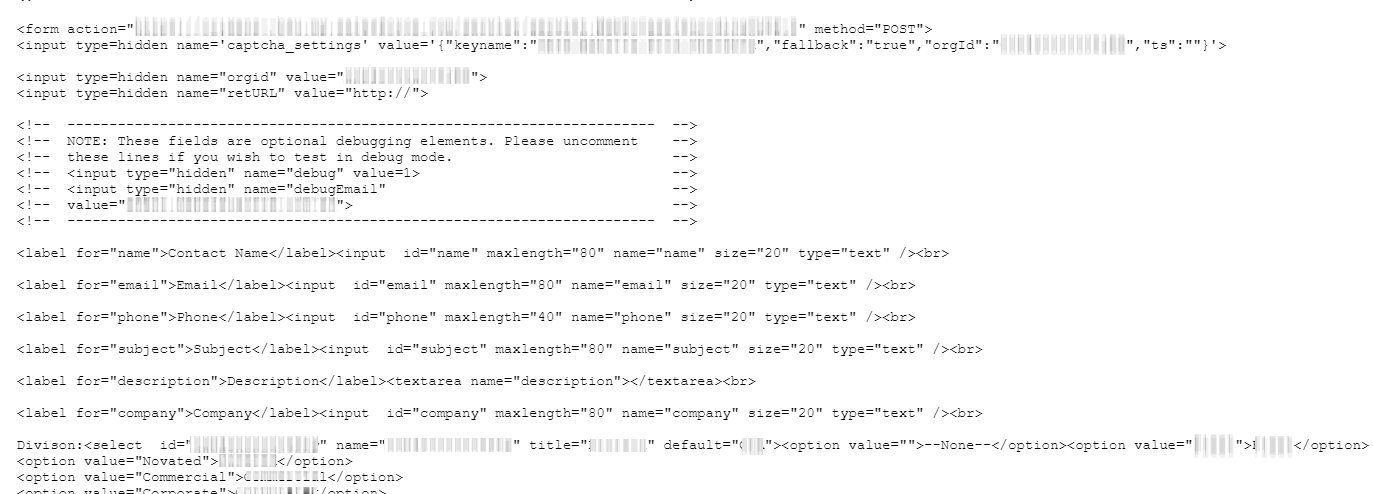
2. Create the Pardot form handler using above information by mapping External field names (Salesforce Web to Lead codes in this case) with Pardot field names.
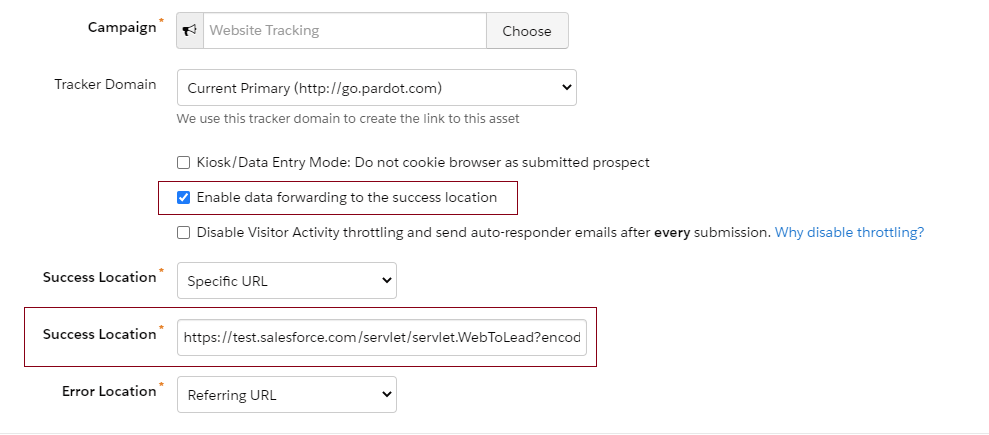
Make sure “Enable data forwarding to the success location” is checked and Salesforce form action post URL (this URL will be in Web to Lead codes) is added to the “Success Location” field of the form handler before saving it.
3. Get your developer to add the Web to Lead form codes within the form section of the landing page template and the necessary CSS codes to style the form.
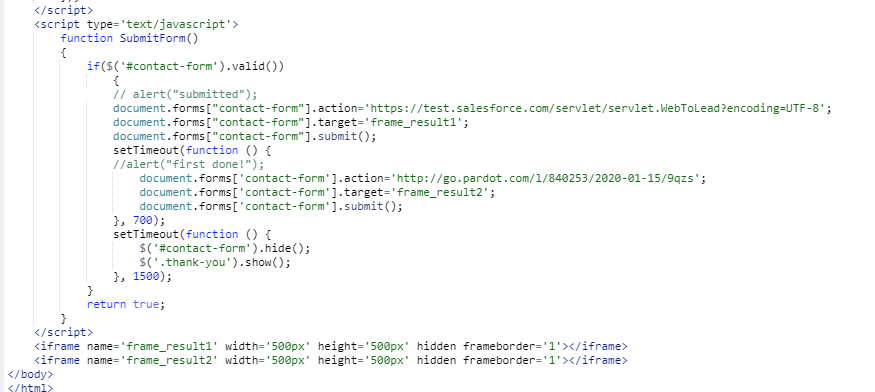
4. Finally, make sure your developer has added necessary JavaScripts required for the form in the end of the “body” section of the HTML. This is subjective and can vary for different forms. Some examples where you may require your developer to include Javascript are Validation field errors, submit action or other field dependencies required for the form fields.
Please keep in mind that for Submit action, both form action URL of Web to Lead as well the Pardot form handler URL must be added as in the below image.
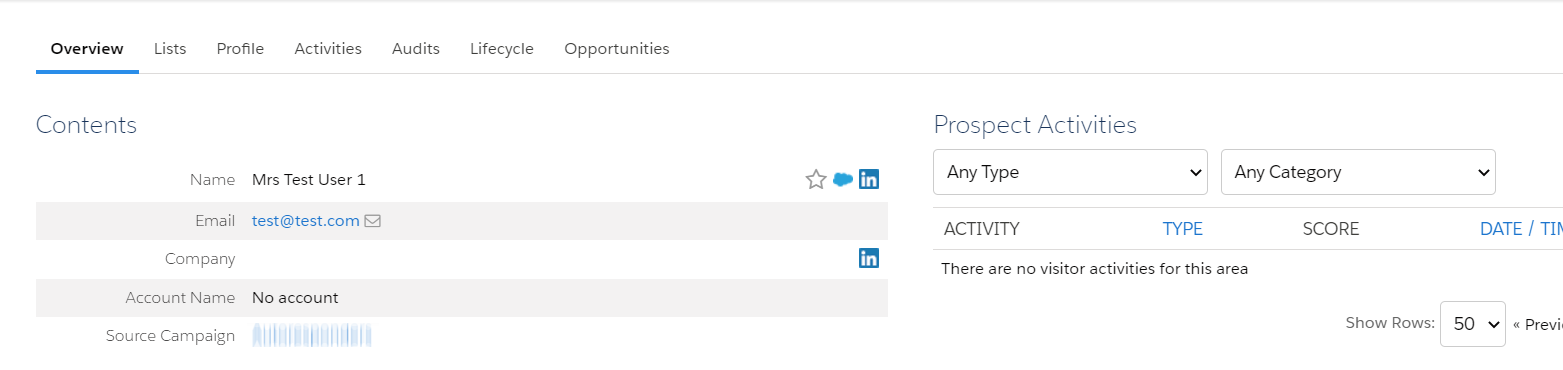
Once the above is implemented, do a few test submissions to check if the submissions are coming through and getting assigned to the respective Sales person as expected. Note that all Prospect activities of the submissions will get added to the first synched Prospect with Salesforce (as in the first image attached below) and other Prospect duplicates will not have any activities in the “Pardot Activities” section (see second and third images of prospect duplicates). In this scenario, the duplicates in Pardot are only for assignment purposes.
Please note: By following the above process you are at risk of reaching your Pardot Contact limits a lot quicker.
Image below: The first active prospect in Pardot where all the activities will be associated.
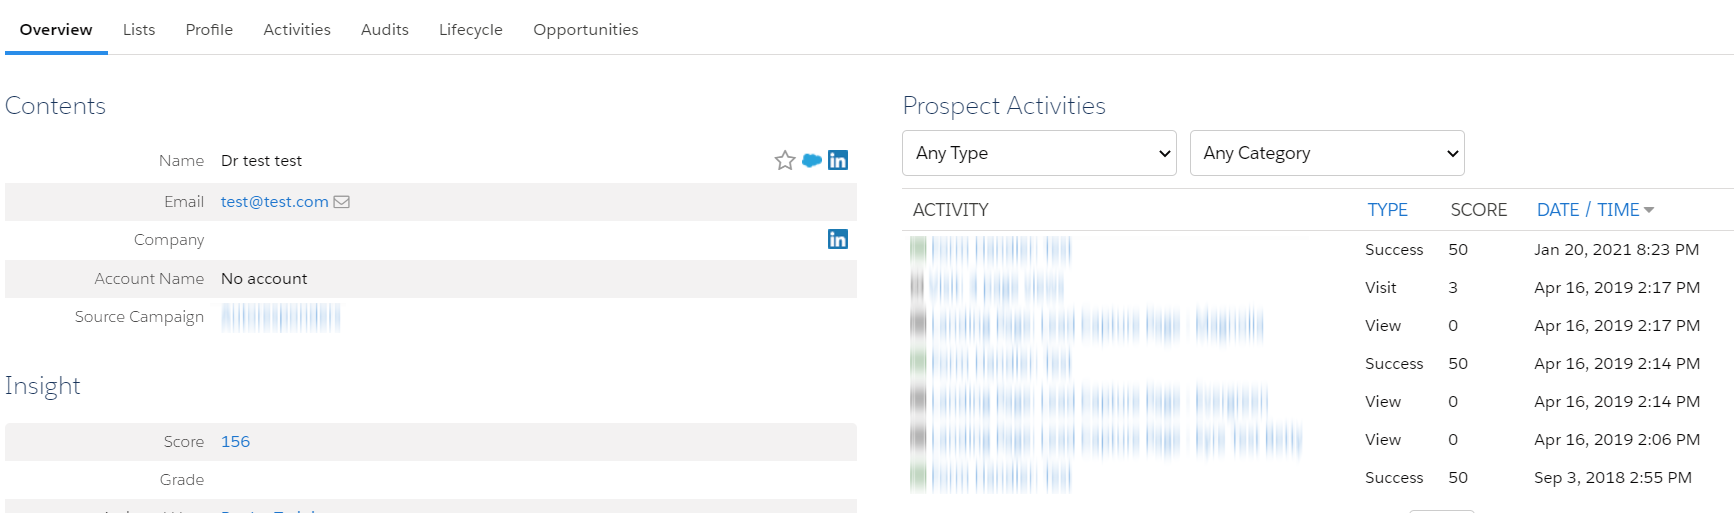
Image below: Inactive duplicate prospect created by the form handler
Recent Posts

International Women’s Day
International Women’s Day International Women’s Day is an opportunity to celebrate successes women are achieving in the workplace. To mark International Women’s Day 2022, we asked our women in tech what they most [...]