Using Conditional Merge Fields in Pardot to send Quotes and Product specific Autoresponders
Along with the update from Pardot’s PML variable language ( %%first_name%% ) to the new HML language ( {{Recipient.FirstName}} ) comes the ability to use conditional merge field statements in Pardot emails.
Conditional merge field statements involve using {{#if}} statements to determine whether to show specific content in an email based on whether a merge field has a value or {{else}} show something different if the field is blank. Here is a Salesforce article explaining this concept further.
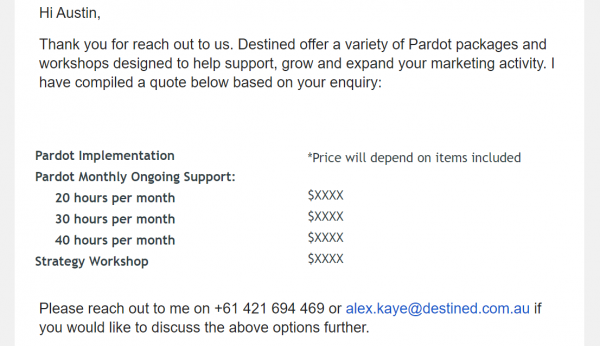
This functionality provides an opportunity for additional personalisation in scenarios where you would like to replace a statement if a prospect does not have a value captured (e.g. replacing “Dear {{Recipient.FirstName}}” when a prospect does not have a first name captured in Pardot). One of the more advanced use-cases includes setting up an autoresponder template to provide quotes/further information about specific products that prospects have selected on your enquiry form.
Considerations for this setup:
- Each product or service will need to be its own field in Pardot (conditional merge field statements cannot use multi-select fields).
- You will need to consider whether multiple submissions of the same form should trigger the autoresponder each time and if so, whether the products selected should accumulate or reset for each enquiry. Note: if it should reset or only trigger once, you will need to trigger the email via an automation rule and also clear the fields as an action.
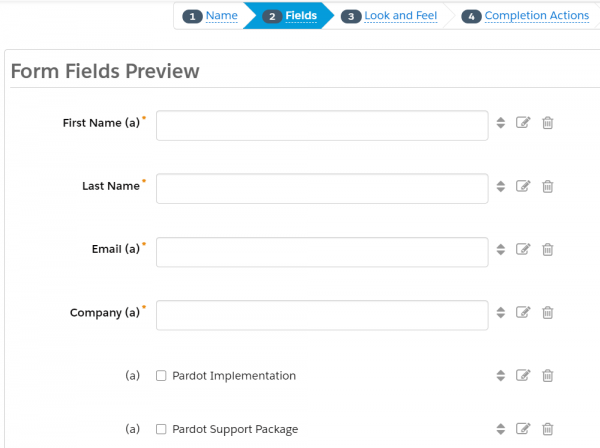
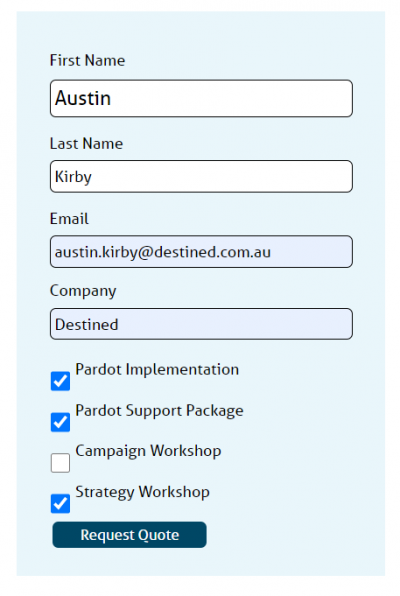
To complete this setup, you will likely need to create some new fields for your products to be displayed on your form.

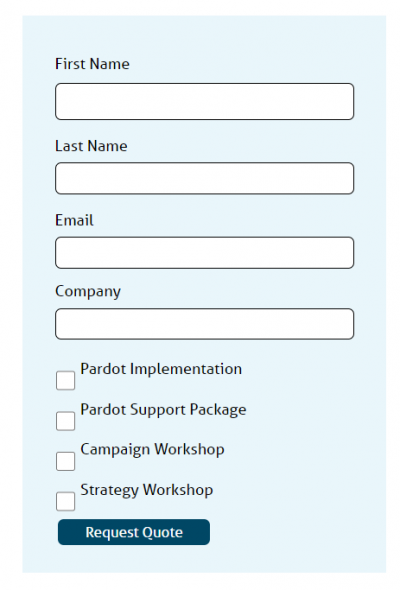
Next, you will need to create your form using the new fields you have created. In this example, we have set the fields as checkboxes without a label.
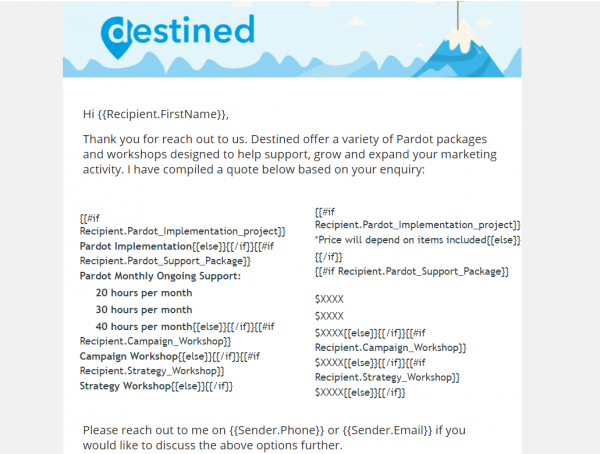
Once your form has been created, you will now need to build your email template using the conditional merge field statements referencing the fields on your form. Each product (checkbox) will need to have it’s own statement. In the event that one of the new product fields was not checked, we will not show anything (this can be achieved by using “{{else}}{{/if}}” in your statement). Note: you will need to have the following statement begin on the same line as the previous statement to avoid any gaps in rows (this can be seen in the “{{/if}}{{#if Recipient” section of the statement).
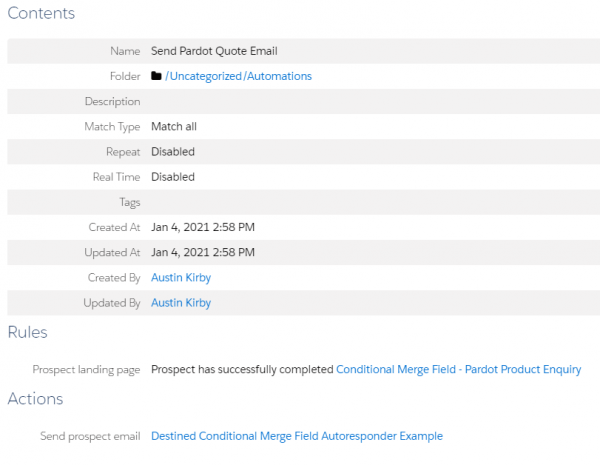
Once you have created your email and statements, you will then need to create an automation rule to control whether to send the email only once (for the first enquiry) or whether to send the email multiple times and reset the field values after each match. The below screenshot demonstrates sending the email only once.
Finally, it’s important to test your form and email statements to ensure they are correctly set up. It’s also important to ensure that there are no gaps in between statements.
Recent Posts

International Women’s Day
International Women’s Day International Women’s Day is an opportunity to celebrate successes women are achieving in the workplace. To mark International Women’s Day 2022, we asked our women in tech what they most [...]